
Nikon D5500 User Manual: A Comprehensive Guide
Welcome to your journey with the Nikon D5500! This comprehensive guide is your reliable companion‚ offering clear instructions and helpful tips. This manual provides a dependable guide to operating your new camera with confidence. Explore its features and unleash your photographic potential.
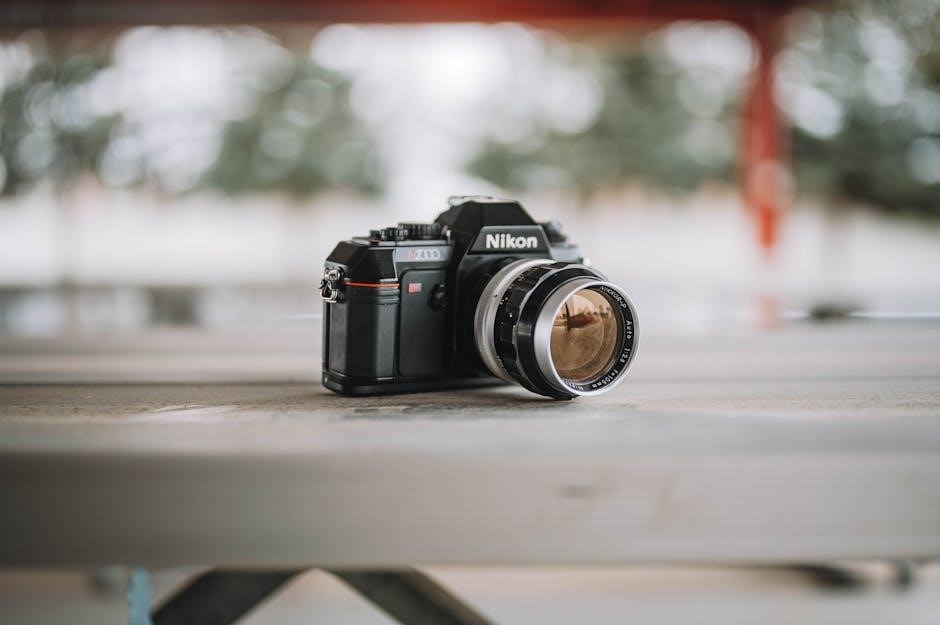
The Nikon D5500 is a versatile SLR camera designed for both beginners and experienced photographers. Featuring a 24.2-megapixel CMOS sensor and EXPEED 4 image processor‚ it delivers high-resolution images with exceptional detail and clarity. Its user-friendly interface and intuitive controls make it easy to capture stunning photos and videos.
This camera boasts a 3.2-inch vari-angle touchscreen LCD‚ allowing for flexible shooting from various perspectives. The D5500 also offers Full HD 1080p video recording capabilities‚ ensuring your videos are as impressive as your photos. Built-in Wi-Fi enables seamless sharing of your creations to smartphones and tablets.
This user manual goes beyond the basics‚ providing in-depth guidance on setting up your camera‚ navigating the menu system‚ and utilizing advanced features. Whether you’re exploring automatic modes or delving into manual settings‚ this guide will help you unlock the full potential of your Nikon D5500. Get ready to embark on a photographic adventure!
With this guide‚ you’ll learn how to take full advantage of the D5500’s capabilities. This manual is designed to help you easily navigate the camera’s features. We will guide you through everything.
Understanding the Camera’s Anatomy
To effectively use your Nikon D5500‚ it’s crucial to understand the layout and functions of its various components. The front of the camera houses the lens mount‚ which accommodates Nikon F mount lenses. Locate the lens release button‚ used to detach the lens. On the top panel‚ you’ll find the mode dial‚ offering access to different shooting modes like Auto‚ Scene‚ and Manual.
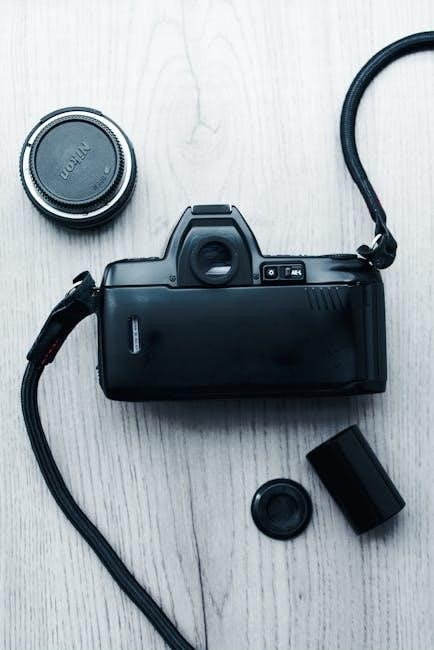
The shutter release button‚ used to capture photos‚ is also on the top panel. The command dial allows you to adjust settings like aperture and shutter speed. The rear of the camera features the 3.2-inch touchscreen LCD‚ providing a clear view for composition and playback. Surrounding the LCD are various buttons‚ including the menu button‚ info button‚ and playback button.
The viewfinder offers an alternative way to compose your shots. The camera’s left side houses input/output ports‚ while the battery compartment and SD card slot are located on the bottom. Familiarizing yourself with these components will empower you to navigate the camera with ease and confidence‚ ensuring you never miss a perfect shot.
Knowing the camera’s anatomy will enable you to quickly adjust settings. This understanding enhances your ability to capture stunning images.
Initial Setup and Basic Operations
Before embarking on your photographic journey with the Nikon D5500‚ some initial setup is required. First‚ insert a fully charged battery into the battery compartment located at the bottom of the camera. Next‚ insert an SD card into the designated slot‚ also on the bottom. These steps are essential for powering the camera and storing your images.
Once powered on‚ you’ll be prompted to set the date‚ time‚ and language. Use the multi-selector buttons to navigate the options and the OK button to confirm your selections. With these settings configured‚ you’re ready to explore the camera’s basic operations. Turn the mode dial to “Auto” for a fully automated shooting experience. In this mode‚ the camera automatically adjusts settings for optimal results.
To take a photo‚ half-press the shutter release button to focus‚ then fully press it to capture the image. Use the zoom ring on the lens to adjust the focal length. The LCD displays shooting information‚ such as shutter speed and aperture. After taking a photo‚ review it by pressing the playback button. These initial steps will set you on the path to capturing beautiful memories with your Nikon D5500.
Navigating the Menu System
Understanding the menu system of your Nikon D5500 is crucial for unlocking its full potential. To access the menu‚ press the “MENU” button located on the back of the camera. This will bring up a screen with several tabs‚ each containing different categories of settings. Use the multi-selector buttons to navigate between tabs such as “Playback menu”‚ “Shooting menu”‚ “Setup menu”‚ “Retouch menu”‚ and “My Menu”.
Within each tab‚ you’ll find various options that can be adjusted to customize your shooting experience. The “Shooting menu” allows you to control image quality‚ ISO sensitivity‚ white balance‚ and other essential parameters. The “Setup menu” contains settings for formatting the memory card‚ adjusting the LCD brightness‚ setting the date and time‚ and more. The “Retouch menu” offers in-camera image editing options.
To change a setting‚ select it with the multi-selector and press the “OK” button. This will bring up a sub-menu with available options. Use the multi-selector to choose your desired setting and press “OK” to confirm. The “My Menu” tab allows you to create a personalized menu with your most frequently used settings for quick access; Familiarizing yourself with these menus will empower you to fine-tune your camera.
Shooting Modes: Auto‚ Scene‚ and Manual
The Nikon D5500 offers a variety of shooting modes to cater to different skill levels and shooting scenarios. The “Auto” mode is the simplest‚ allowing the camera to automatically select the optimal settings for any given scene. This is perfect for beginners or when you need to capture a quick shot without worrying about manual adjustments.
The “Scene” modes provide pre-programmed settings for specific situations‚ such as portrait‚ landscape‚ sports‚ and night photography. Each scene mode optimizes the camera’s settings to achieve the best possible results for that particular scenario. This is a great way to improve your photos in challenging lighting conditions or when capturing specific subjects.
For more experienced photographers‚ the “Manual” mode offers complete control over all camera settings‚ including aperture‚ shutter speed‚ and ISO. This allows you to precisely fine-tune your images and achieve creative effects. Experimenting with manual mode can significantly enhance your understanding of photography and unlock your artistic vision. Each mode provides unique capabilities and it is up to you to master each one.
Exploring Advanced Features
Beyond the basic shooting modes‚ the Nikon D5500 unlocks a wealth of advanced features designed to elevate your photography. Dive into features such as Active D-Lighting‚ which optimizes images to retain details in both highlights and shadows‚ ensuring balanced exposures even in high-contrast situations. The HDR (High Dynamic Range) mode combines multiple exposures to create images with a wider range of tones‚ capturing scenes with exceptional detail.
Experiment with the camera’s built-in effects‚ which offer creative filters and adjustments to add artistic flair to your photos. Consider manual mode‚ which lets you fine-tune shutter speed‚ aperture‚ and ISO for full control over image creation. You can customize various aspects of the camera to suit your shooting preferences. Explore options such as button assignments‚ menu customization‚ and shooting display settings.
Utilize the built-in Wi-Fi connectivity to instantly share your photos with smartphones or tablets‚ and even remotely control the camera. These advanced features can help you achieve professional-looking results and express your unique photographic style.
Custom Settings Menu Overview
The Custom Settings Menu on your Nikon D5500 is your gateway to personalizing the camera’s operation to match your specific shooting style and preferences. Navigating this menu allows you to fine-tune various aspects of the camera’s behavior‚ enhancing your overall shooting experience.
Explore options such as adjusting the auto-focus behavior‚ including focus tracking sensitivity and focus point illumination. Customize button assignments to quickly access frequently used functions‚ streamlining your workflow. For example‚ you can assign the Fn button to control ISO sensitivity or white balance.
The menu also offers settings to fine-tune exposure control‚ metering modes‚ and flash behavior‚ giving you greater precision in capturing your desired images. Delve into settings that control image review duration‚ grid display options‚ and information display preferences. Tailor the camera’s interface to suit your visual preferences and ensure that you have the information you need at a glance.
By carefully exploring and configuring the Custom Settings Menu‚ you can optimize your Nikon D5500 to become an extension of your creative vision.
Troubleshooting Common Issues
Even with a well-designed camera like the Nikon D5500‚ encountering occasional issues is a part of the photographic journey. This section provides guidance on resolving common problems‚ ensuring you can quickly get back to capturing stunning images.
Start by checking the basics: Ensure the battery is charged‚ the memory card is properly inserted‚ and the lens is securely attached. If the camera won’t turn on‚ try a different battery or check the battery contacts for any debris.
Encountering blurry images? Verify that your focus mode is appropriate for the subject and that your shutter speed is fast enough to prevent motion blur. Explore menu settings related to image stabilization and adjust them as needed.
If you notice unusual colors or exposure issues‚ double-check your white balance and metering mode settings. Experiment with different settings to achieve the desired results.
For error messages‚ consult the camera’s manual for specific troubleshooting steps. When all else fails‚ resetting the camera to its default settings can often resolve software-related glitches. Remember to back up any important data before performing a reset.
Maintenance and Care of Your D5500

Proper maintenance is essential to prolonging the life and performance of your Nikon D5500. Regular cleaning and careful handling will keep it in optimal condition‚ ensuring you can capture stunning images for years to come.
Always power off the camera and remove the battery before cleaning. Use a soft‚ dry microfiber cloth to gently wipe the exterior surfaces‚ removing dust and fingerprints. Avoid using excessive moisture or harsh chemicals‚ as they can damage the camera’s finish.
To clean the lens‚ use a dedicated lens cleaning cloth and solution. Apply a small amount of solution to the cloth and gently wipe the lens in a circular motion‚ starting from the center and moving outwards. Inspect the lens regularly for scratches or damage.
Store your D5500 in a cool‚ dry place‚ away from direct sunlight and extreme temperatures. When not in use‚ consider placing it in a camera bag or case to protect it from dust and impacts.
Periodically check and clean the camera’s sensor‚ following the instructions in the user manual. Avoid touching the sensor directly‚ as it is delicate and easily damaged.
Utilizing Nikon Manual Viewer 2
Nikon Manual Viewer 2 is a handy application that provides you with easy access to your Nikon D5500’s user manual on your smartphone or tablet. This free app can be downloaded from the App Store or Google Play‚ allowing you to carry the entire manual with you wherever you go.
With Nikon Manual Viewer 2‚ you can quickly search for specific topics‚ browse through different sections‚ and even bookmark pages for future reference. This makes it incredibly convenient to find answers to your questions and learn more about your camera’s features.
The app also includes interactive diagrams and illustrations that help you visualize and understand complex concepts. Whether you’re a beginner or an experienced photographer‚ Nikon Manual Viewer 2 is a valuable tool for mastering your D5500.
To get started‚ simply download the app‚ select your camera model‚ and start exploring. You can use the app offline‚ so you don’t need to worry about an internet connection. Keep the Nikon Manual Viewer 2 on your device for quick access.